Tuesday Torch Tips: Etching Part II
This is the conclusion to the etching post I wrote a few weeks ago.
Some beads look great straight out of the etching bath. Others tend to look too dry and even a bit dull. I have found that applying a light coating of a wax/oil mixture (I just refer to it as “polish”) gives me exactly the look I am going for. I want something between the total shine of an unetched bead and the dryness of an etched bead. The polish is easy to make and a little goes a long way, this is how I make it…
I use a mix of bees wax (since we have bees, and I think it is the nicest wax) and olive oil. You could simply use straight olive oil (or any other kind of oil you like) to polish your beads, but the bees wax helps the polish to stay on the bead much longer.
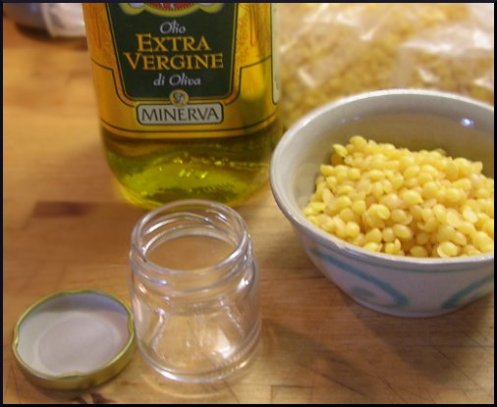
In the image above you can see whats needed to make the polish. You can probably find beeswax in little pellets like I have here, in a craft store, or through your local beekeeper. The pellets make it really easy to work with. The jar I am using is a 1.5oz size. This will last you for months or maybe even longer.
If you don’t have a jar this size you could use a baby food jar or anything around that size. I am using a ratio of 1 part wax to 2 parts oil so to fill my jar I started with 1 Tbls. wax and 2 Tbls. oil.
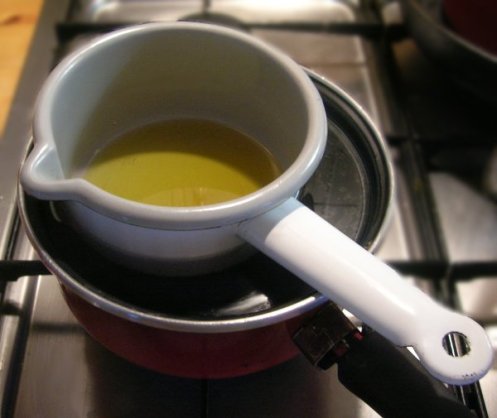
Fill a sauce pan with water, then set a smaller pan into it. Put your wax and oil into the smaller pan and heat til the water is boiling. When the wax melts lower the temp to a gentle simmer, just enough to keep the mixture liquid.
Now is the time to add any fragrance that you might want to add. For instance orange or lemon or lavender. Use just a few drops of essential oil. I don’t add fragrance to the polish that I use on the beads I sell because no matter what you use there will be someone who doesn’t like the scent or who is sensitive to it. But for your own personal use, you might enjoy adding a bit of scent.
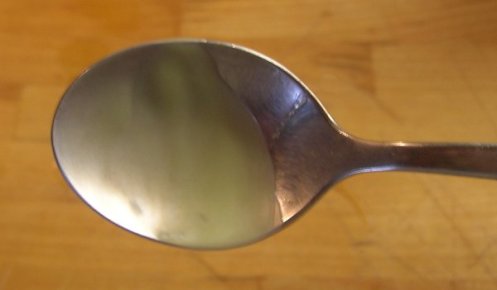
The next step is to test the consistency of the polish, you don’t want it to be too hard and then again, you don’t want it to be too soft. I like mine to be about the consistency of Vaseline or just a touch firmer. To test the consistency, use a metal spoon, preferably a very cold one (put a few teaspoons in the refrigerator shortly before you begin). Dip a spoon into the mixture and wait a few moments until it is cool. If your spoon is cold, this won’t take long. Then rub your fingers into the mixture and see what it feels like. If it is not quite right, add either a touch more oil or more wax until you get the consistency you are looking for.
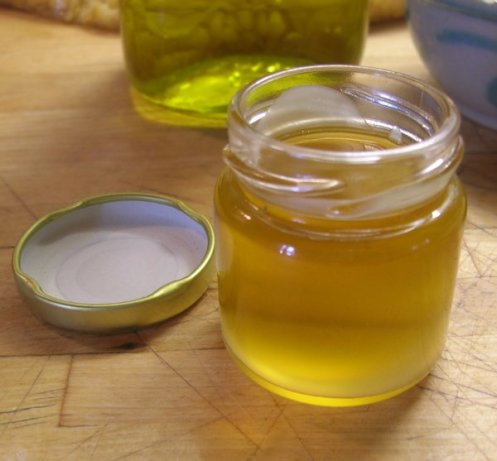
When it is just right, pour the mixture into your jar and let it set, with the lid off, until it is completely cool.
To use…
Put a small dab of the polish on your fingers and rub it over the entire bead, then using a nice lint-free soft cloth (I use an old tee-shirt) rub the polish in and remove the excess. This should give your beads a nice low shine. It’s like putting a dried river stone into water, all the colors come alive again :O)
(Tuesday’s Torch Tips is an ongoing weekly series of articles. If you’ve got any suggestions for future tips, please leave me a comment and I’ll cover them if possible. Torch Tips will cover a wide variety of topics including; basic lampworking techniques, design, photography, marketing and selling, and so on.)


[…] is the original post: Tuesday Torch Tips: Etching Part II « LavenderCreek Glass beads-look, exactly-the-look, great-straight, light-coating, look-too, oil-mixture This […]
Tuesday Torch Tips: Etching Part II « LavenderCreek Glass | glassetching said this on January 5, 2010 at 4:23 pm
I always use Renaissance wax for this purpose. It has a few advantages over the olive or other oil mixtures as it is purely mineral based. This prevents it from getting smelly with time.
For years I have used a mixture of oils and beeswax to polish the wood beads i use for my rosarymaking, sometimes adding a few drops of pure essential rose oil. In a matter of 3-4 years however, you will start to notice a little smell of old oil.
I guess I just prefer to use something I know is natural and that I have made myself. Also I don’t particularly care for mineral oil. I’ve heard of people using Renaissance Wax and even Armour-All but I just like my wax and oil better. I have never had a problem with it getting smelly. I think the reason you might have experienced an old smell is because the oil soaks into your beads since they are wood. They don’t sink into glass. As time goes on, the olive oil and wax naturally wear off, but new oils are continually being added (if the bead is being worn or handled) by the natural oils of our hands and skin.
Teresa, just wanted to let you know that I love your recipe and have been using it on my tumble etched hollows- it’s great!
I think I must have added a little too much beeswax since mine is pretty firm, I didn’t have the pellets which probably threw my measurements off.
Thanks for sharing!
Aja
Hi Aja,
I’m so glad that you found the wax mixture useful! The measurements can be a bit touchy, you can always remelt it and add more oil or more wax, whichever is lacking.